Are you tired of cakes sticking to the pan and ruining your baking masterpiece? Say goodbye to those frustrating moments with our expert tips on how to keep cake from sticking to the pan like a pro baker!
Whether you’re a seasoned baker or just starting your baking journey, these tried-and-true methods will ensure that your cakes release flawlessly every time, leaving you with beautifully intact desserts that are sure to impress.
How To Keep Cake From Sticking To Pan
Flour and Grease
The “Flour and Grease” method is a classic technique used to prevent cakes from sticking to the pan. Here’s a more detailed explanation of how to use this method effectively:
- Prepare the Pan: Choose the appropriate pan size and shape for your cake recipe.
Grease the pan using softened butter, vegetable shortening, or cooking spray. Use a pastry brush or paper towel to ensure even coverage on the bottom and sides of the pan. - Apply Flour: After greasing, lightly dust the greased surface with flour. You can use all-purpose flour or a mixture of flour and cocoa powder for chocolate cakes. The flour creates a barrier between the cake batter and the pan, preventing sticking.
- Tap Out Excess Flour: Gently tap the pan upside down over a sink or garbage can to remove any excess flour. You want a thin, even layer of flour coating the greased surface without clumps.
- Prepare the Cake Batter: Follow your cake recipe to prepare the batter. Make sure it’s well mixed and smooth before pouring it into the prepared pan.
- Pour the Batter: Pour the cake batter into the greased and floured pan, spreading it evenly with a spatula if necessary.
- Bake as Directed: Place the pan in the preheated oven and bake the cake according to your recipe’s instructions.
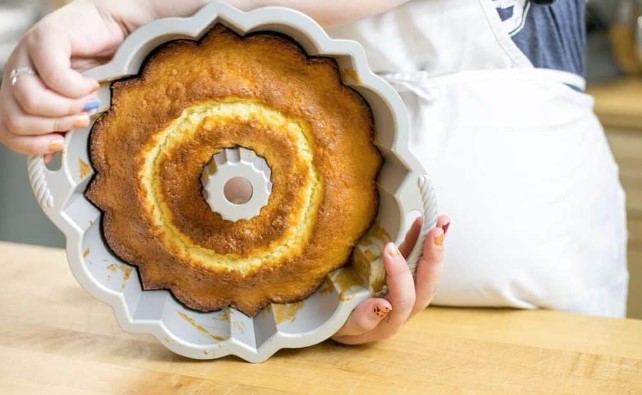
- Cool and Release the Cake: Once the cake is baked, remove it from the oven and let it cool in the pan on a wire rack for a few minutes. To release the cake from the pan, run a knife or offset spatula around the edges to loosen it. Place a plate or cooling rack on top of the pan, then carefully flip it over to release the cake onto the plate or rack.
- Serve or Decorate: Allow the cake to cool completely before slicing and serving. You can also decorate the cake with frosting, glaze, or toppings as desired.
Using the “Flour and Grease” method ensures that your cake releases easily from the pan, maintaining its shape and appearance for a beautiful presentation.
Greased Parchment Paper
Using greased parchment paper is an effective method to prevent cakes from sticking to the pan. Here’s a detailed guide on how to use greased parchment paper:
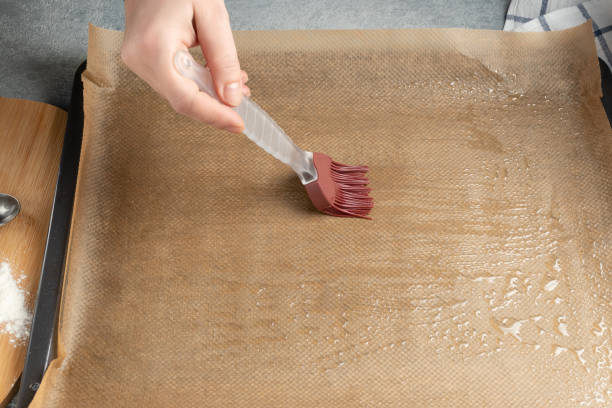
- Prepare the Pan: Choose a cake pan that matches the size and shape recommended in your recipe. Grease the pan using butter, shortening, or cooking spray. Ensure that you cover the bottom and sides of the pan evenly.
- Cut Parchment Paper: Take a sheet of parchment paper and place it over the bottom of the greased cake pan. Trace around the pan with a pencil or marker to mark the size of the parchment paper needed. Cut along the traced lines to create a parchment paper round that fits the bottom of the pan.
- Grease the Parchment Paper: Once you have the parchment paper round, grease it lightly using butter, shortening, or cooking spray. Make sure to coat the entire surface of the parchment paper.
Place the Greased Parchment Paper: Gently place the greased parchment paper round into the bottom of the greased cake pan. Press it down slightly to ensure it adheres to the greased surface of the pan. - Prepare the Cake Batter: Follow your cake recipe to prepare the batter, ensuring it’s well mixed and smooth.
- Pour the Batter: Pour the prepared cake batter into the cake pan, spreading it evenly with a spatula if necessary.
- Bake as Directed: Preheat your oven to the temperature specified in your recipe.
Place the cake pan with the batter into the preheated oven and bake according to the recipe’s instructions. - Cool and Remove the Cake: Once the cake is baked, remove it from the oven and let it cool in the pan on a wire rack for a few minutes. To remove the cake from the pan, run a knife or offset spatula around the edges to loosen it. Place a plate or cooling rack on top of the pan, then carefully flip it over to release the cake onto the plate or rack. Peel off the greased parchment paper from the bottom of the cake.
- Serve or Decorate: Allow the cake to cool completely before slicing and serving. You can also decorate the cake with frosting, glaze, or toppings as desired.
Using greased parchment paper ensures easy release of the cake from the pan, resulting in a perfectly shaped and intact cake for serving and enjoyment.
Magic Cake Pan Release
Magic Cake Pan Release is a homemade solution that acts as a non-stick coating for cake pans. Here’s a step-by-step guide on how to make and use Magic Cake Pan Release:
Ingredients:
- 1 cup vegetable oil
- 1 cup vegetable shortening
- 1 cup all-purpose flour
Instructions:
- Combine Ingredients: In a mixing bowl, combine the vegetable oil, vegetable shortening, and all-purpose flour. Mix the ingredients thoroughly until you achieve a smooth and well-combined mixture. You can use a hand mixer or a whisk for this step.
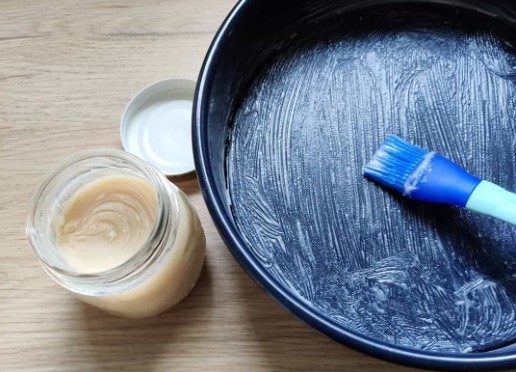
- Store in a Jar: Transfer the Magic Cake Pan Release mixture into a clean and airtight jar or container. Label the jar for easy identification.
- Grease the Cake Pan: Before baking a cake, use a pastry brush or paper towel to apply a thin layer of Magic Cake Pan Release to the bottom and sides of the cake pan.
Ensure that the entire surface of the pan is coated evenly with the mixture. - Pour the Cake Batter: Pour the prepared cake batter into the greased cake pan, spreading it evenly with a spatula if needed.
- Bake as Directed: Preheat your oven to the temperature specified in your cake recipe. Place the cake pan with the batter into the preheated oven and bake according to the recipe’s instructions.
- Cool and Remove the Cake: Once the cake is baked, remove it from the oven and let it cool in the pan on a wire rack for a few minutes. To remove the cake from the pan, run a knife or offset spatula around the edges to loosen it. Place a plate or cooling rack on top of the pan, then carefully flip it over to release the cake onto the plate or rack.
- Serve or Decorate: Allow the cake to cool completely before slicing and serving. You can also decorate the cake with frosting, glaze, or toppings according to your preference.
Magic Cake Pan Release creates a non-stick surface that helps prevent cakes from sticking to the pan, making it easier to remove and serve the cake without any issues. Make sure to store the remaining Magic Cake Pan Release in a cool, dry place for future use.
Non-Stick Baking Spray
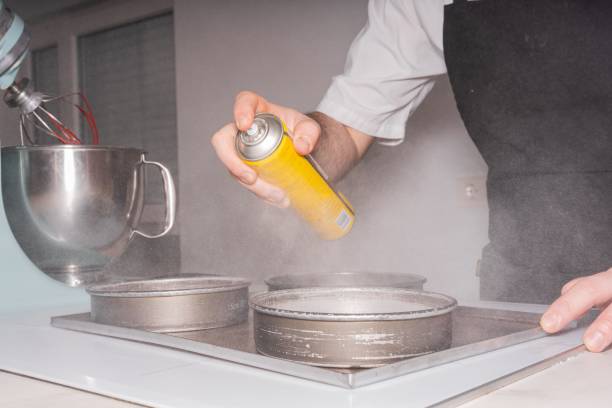
Non-stick baking spray is a convenient and effective solution for preventing cakes from sticking to pans. Here’s a detailed guide on how to use non-stick baking spray for baking cakes:
- Choose the Right Spray: Select a non-stick baking spray specifically designed for baking. These sprays often contain a combination of oils and lecithin to create a non-stick barrier.
- Preheat the Oven: Preheat your oven to the temperature specified in your cake recipe.
- Prepare the Pan: Choose a cake pan that matches the size and shape recommended in your recipe. Hold the non-stick baking spray can about 6 to 8 inches away from the pan.
- Apply the Spray: Shake the can of non-stick baking spray well before use. Spray an even and light coating of the spray onto the bottom and sides of the cake pan. Ensure that the entire surface of the pan is covered with the spray, but avoid applying too much as it may cause a buildup.
- Pour the Cake Batter: Pour the prepared cake batter into the greased cake pan, spreading it evenly with a spatula if necessary.
- Bake as Directed: Place the cake pan with the batter into the preheated oven and bake according to the recipe’s instructions.
- Cool and Remove the Cake: Once the cake is baked, remove it from the oven and let it cool in the pan on a wire rack for a few minutes. To remove the cake from the pan, run a knife or offset spatula around the edges to loosen it. Place a plate or cooling rack on top of the pan, then carefully flip it over to release the cake onto the plate or rack.
- Serve or Decorate: Allow the cake to cool completely before slicing and serving. You can also decorate the cake with frosting, glaze, or toppings as desired.
Non-stick baking spray creates a slick surface that helps cakes release easily from the pan, resulting in a perfectly shaped and intact cake for serving and enjoyment. Make sure to store the non-stick baking spray in a cool, dry place and follow the manufacturer’s instructions for best results.
Shortening
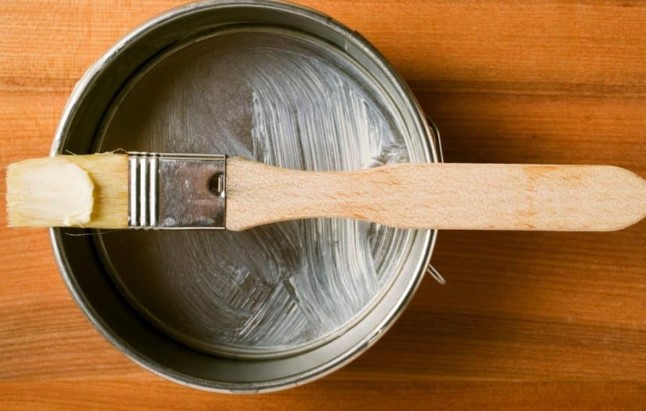
Using shortening is a traditional method to prevent cakes from sticking to pans. Here’s a detailed guide on how to use shortening for baking cakes:
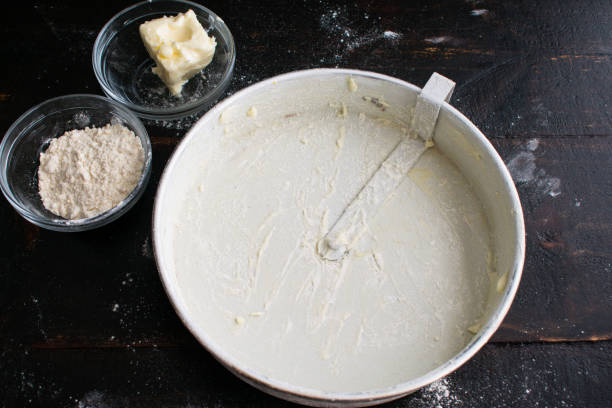
- Prepare the Pan: Choose a cake pan that matches the size and shape recommended in your recipe. Take a small amount of vegetable shortening (solid form) and use your fingers or a paper towel to evenly coat the bottom and sides of the cake pan.
- Spread the Shortening: Ensure that the shortening is spread in a thin, even layer on all surfaces of the pan. Pay attention to corners and edges to prevent any sticking.
- Add Flour (Optional): If desired, you can dust the greased pan with a light coating of flour after applying the shortening. This step helps create an additional non-stick barrier between the cake batter and the pan.
- Prepare the Cake Batter: Follow your cake recipe to prepare the batter, ensuring it’s well mixed and smooth.
- Pour the Batter: Pour the prepared cake batter into the greased and floured (if using) cake pan, spreading it evenly with a spatula if necessary.
- Bake as Directed: Preheat your oven to the temperature specified in your cake recipe. Place the cake pan with the batter into the preheated oven and bake according to the recipe’s instructions.
- Cool and Remove the Cake: Once the cake is baked, remove it from the oven and let it cool in the pan on a wire rack for a few minutes. To remove the cake from the pan, run a knife or offset spatula around the edges to loosen it. Place a plate or cooling rack on top of the pan, then carefully flip it over to release the cake onto the plate or rack.
- Serve or Decorate: Allow the cake to cool completely before slicing and serving. You can also decorate the cake with frosting, glaze, or toppings as desired.
Using shortening provides a greasy barrier that prevents cakes from sticking to pans, ensuring easy release and intact presentation of the cake. Remember to store shortening in a cool, dry place and use clean utensils when handling it for baking purposes.
Ghee
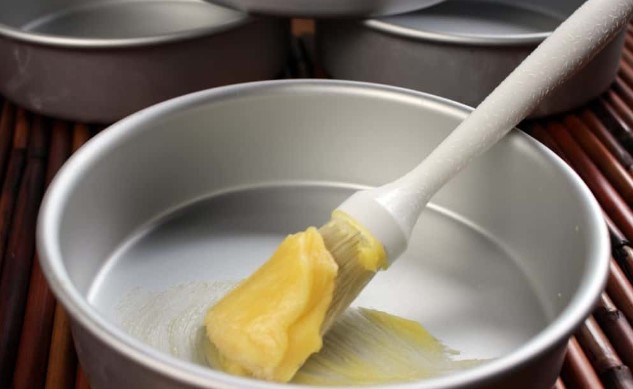
Using ghee as a non-stick agent for baking cakes can add a rich flavor while preventing sticking. Here’s how you can use ghee effectively:
- Prepare the Pan: Choose a cake pan that matches the size and shape recommended in your recipe. Take a small amount of ghee (clarified butter) and use a pastry brush or paper towel to evenly coat the bottom and sides of the cake pan.
- Spread the Ghee: Ensure that the ghee is spread in a thin, even layer on all surfaces of the pan, including corners and edges.
- Prepare the Cake Batter: Follow your cake recipe to prepare the batter, ensuring it’s well mixed and smooth.
- Pour the Batter: Pour the prepared cake batter into the greased cake pan, spreading it evenly with a spatula if necessary.
- Bake as Directed: Preheat your oven to the temperature specified in your cake recipe. Place the cake pan with the batter into the preheated oven and bake according to the recipe’s instructions.
- Cool and Remove the Cake: Once the cake is baked, remove it from the oven and let it cool in the pan on a wire rack for a few minutes. To remove the cake from the pan, run a knife or offset spatula around the edges to loosen it. Place a plate or cooling rack on top of the pan, then carefully flip it over to release the cake onto the plate or rack.
- Serve or Decorate: Allow the cake to cool completely before slicing and serving. You can also decorate the cake with frosting, glaze, or toppings as desired.
Using ghee provides a flavorful and non-stick surface for baking cakes, ensuring easy release and a delicious taste. Remember to store ghee in a cool, dry place and use it at room temperature for best results in greasing cake pans.
Aluminum Foil
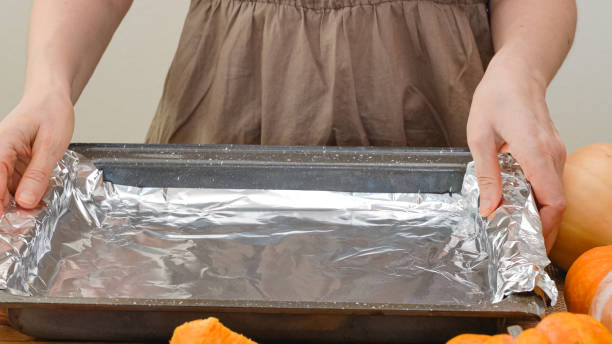
Using aluminum foil is a versatile method to prevent cakes from sticking to pans. Here’s a step-by-step guide on how to use aluminum foil for baking cakes:
- Prepare the Pan: Choose a cake pan that matches the size and shape recommended in your recipe. Tear off a piece of aluminum foil slightly larger than the bottom of the cake pan.
- Grease the Foil: Grease the shiny side of the aluminum foil with butter, shortening, or cooking spray. Ensure that the entire surface of the foil is coated evenly.
- Line the Pan: Place the greased aluminum foil inside the bottom of the cake pan, pressing it gently to adhere to the pan’s contours. If the cake recipe requires greasing the sides of the pan, you can also line the sides with greased aluminum foil strips.
- Prepare the Cake Batter: Follow your cake recipe to prepare the batter, ensuring it’s well mixed and smooth.
- Pour the Batter: Pour the prepared cake batter into the lined cake pan, spreading it evenly with a spatula if necessary.
- Bake as Directed: Preheat your oven to the temperature specified in your cake recipe.
Place the cake pan with the batter into the preheated oven and bake according to the recipe’s instructions. - Cool and Remove the Cake: Once the cake is baked, remove it from the oven and let it cool in the pan on a wire rack for a few minutes. To remove the cake from the pan, lift the edges of the aluminum foil carefully. Place a plate or cooling rack on top of the pan, then carefully flip it over to release the cake onto the plate or rack.
- Serve or Decorate: Allow the cake to cool completely before slicing and serving. You can also decorate the cake with frosting, glaze, or toppings as desired.
Using aluminum foil provides a non-stick and easily removable lining for cake pans, ensuring that cakes come out cleanly and intact. Make sure to grease the foil well to prevent any sticking issues.
Silicone Pan or Mat
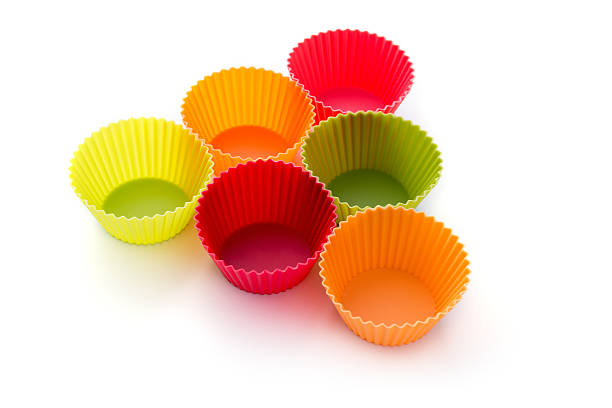
Using a silicone pan or silicone baking mat is a convenient and effective method to prevent cakes from sticking to pans. Here’s a step-by-step guide on how to use a silicone pan or mat for baking cakes:
- Choose the Silicone Pan or Mat: Select a silicone cake pan or silicone baking mat that fits the size and shape required for your cake recipe. Silicone pans come in various shapes, such as round, square, and loaf pans, while silicone baking mats are typically rectangular and can be used on baking sheets.
- Preheat the Oven: Preheat your oven to the temperature specified in your cake recipe.
- Prepare the Silicone Pan or Mat: If using a silicone pan, there is usually no need to grease it as silicone has natural non-stick properties. However, you can lightly grease it if desired for extra assurance. If using a silicone baking mat, place it on a baking sheet or tray.
- Prepare the Cake Batter: Follow your cake recipe to prepare the batter, ensuring it’s well mixed and smooth.
- Pour the Batter: Pour the prepared cake batter into the silicone pan or onto the silicone baking mat, spreading it evenly with a spatula if necessary.
- Bake as Directed: Place the silicone pan or baking mat with the batter into the preheated oven and bake according to the recipe’s instructions.
- Cool and Remove the Cake: Once the cake is baked, remove it from the oven and let it cool in the silicone pan or on the silicone baking mat on a wire rack for a few minutes. For silicone pans, gently flex the sides to release the cake. For silicone baking mats, carefully lift the edges to release the cake. Transfer the cake to a serving plate or cooling rack.
- Serve or Decorate: Allow the cake to cool completely before slicing and serving. You can also decorate the cake with frosting, glaze, or toppings as desired.
Using a silicone pan or mat provides a naturally non-stick surface for baking cakes, making it easy to remove the cake without any sticking issues. Moreover, silicone pans and mats are reusable, dishwasher-safe, and can withstand high temperatures, making them a durable and convenient option for baking.
Buy a Non-Stick Pan

Buying a non-stick pan is a straightforward and convenient solution to prevent cakes from sticking during baking. Here’s a guide on what to consider when purchasing a non-stick pan for baking cakes:
- Choose the Right Size and Shape: Select a non-stick cake pan that matches the size and shape recommended in your cake recipe. Common shapes include round, square, rectangular, and loaf pans.
- Check the Material: Non-stick pans are typically made of aluminum or steel with a non-stick coating. Consider the material based on your baking needs and preferences. Aluminum pans heat up quickly and evenly, while steel pans are more durable and resistant to warping.
- Look for a High-Quality Non-Stick Coating: Ensure that the non-stick coating is of high quality and PFOA-free for safe cooking. Some non-stick coatings are reinforced with ceramic, titanium, or silicone for added durability and scratch resistance.
- Consider Depth and Thickness: Choose a pan with an appropriate depth for the type of cake you’re baking. Deeper pans are ideal for layered cakes, while shallow pans are suitable for sheet cakes and brownies. Opt for a pan with a sturdy and thick construction to prevent warping and ensure even baking.
- Handles and Design: Check for ergonomic handles that provide a comfortable grip and ease of handling when placing the pan in the oven or removing it. Consider the design features such as rolled edges for easy pouring and reinforced rims for durability.
- Maintenance and Care: Follow the manufacturer’s instructions for care and maintenance to prolong the lifespan of your non-stick pan. Avoid using metal utensils that can scratch the non-stick coating. Use silicone, nylon, or wooden utensils instead.
- Bake as Directed: Preheat the non-stick pan according to your cake recipe’s instructions before pouring in the batter. Bake the cake as directed, monitoring the cooking time and temperature for optimal results.
By investing in a high-quality non-stick pan, you can enjoy effortless cake release, easy cleanup, and consistent baking results. Make sure to handle and care for your non-stick pan properly to maintain its non-stick properties for long-lasting use.
Why Do Cakes Stick To The Pan?
Cakes can stick to the pan due to various factors. Here are some common reasons why cakes may stick and methods to prevent sticking:
The Cake Is Too Hot or Too Cold
- If you try to remove the cake from the pan while it’s still too hot, it may stick to the pan.
- Allow the cake to cool slightly before attempting to remove it.
- Conversely, if the cake is too cold, it may contract and stick to the pan. Allow the cake to cool to room temperature before trying to remove it.
Insufficient Greasing
- Not greasing the pan properly can lead to sticking. Use butter, vegetable shortening, cooking spray, or a non-stick baking spray to grease the pan thoroughly, including the bottom and sides.
Not Using the Proper Baking Spray
- Using a baking spray that is not specifically designed for baking or is not a non-stick spray can result in sticking. Choose a high-quality non-stick baking spray for best results.
Your Parchment Paper Is Not Up To Size
- If using parchment paper to line the pan, ensure that it fits the bottom of the pan perfectly. Trim any excess paper to prevent it from folding over the cake batter and causing sticking.
Use a Cooling Rack
- Allow the cake to cool in the pan on a wire cooling rack for a few minutes before attempting to remove it. This helps prevent the cake from sticking to the pan due to steam condensation.
Tapping Method
- After baking, gently tap the bottom of the cake pan to loosen the cake. Place a plate or cooling rack on top of the pan, then flip it over to release the cake onto the plate or rack.
- You can also run a knife or offset spatula around the edges of the cake to loosen it before removing from the pan.
By addressing these factors and using proper techniques, you can prevent cakes from sticking to the pan and ensure easy removal and intact presentation of your baked goods.
Frequently Asked Questions (FAQs) – How To Keep Cake From Sticking To Pan
Q: What are some effective methods to prevent cakes from sticking to the pan?
A: You can ensure non-stick success by greasing the pan with butter or oil, using parchment paper for easy release, or dusting the pan with flour or cocoa powder for a smooth finish.
Q: Is there a specific technique for greasing pans that guarantees a cake won’t stick?
A: Yes, applying a thin, even layer of grease to the entire surface and corners of the pan ensures effortless cake removal after baking.
Q: Can I use non-stick cooking spray to prevent cakes from sticking?
A: Absolutely! Non-stick cooking spray is a convenient and effective option to coat your pan evenly and prevent any sticking issues.
Q: What if I want to avoid using butter or oil to grease the pan?
A: You can opt for a non-stick baking spray or brush the pan with melted shortening for a non-greasy yet non-stick baking experience.
Q: How important is it to properly prepare the pan before pouring in the cake batter?
A: Preparing the pan correctly is crucial for easy cake release. Taking the time to grease, line, or dust the pan ensures your cake comes out perfectly every time.
Q: Can I use silicone baking molds instead of traditional pans to prevent sticking?
A: Yes, silicone baking molds are known for their non-stick properties, making them an excellent choice for hassle-free cake baking and removal.
Q: Are there any tricks for removing cakes from the pan without damaging them?
A: Allowing the cake to cool slightly before gently loosening the edges with a knife or offset spatula helps in seamless and intact cake extraction.
Q: Should I let the cake cool completely in the pan before trying to remove it?
A: Yes, allowing the cake to cool in the pan for a few minutes after baking helps it set and makes it easier to transfer to a cooling rack without breaking.
Q: Can I reuse parchment paper or silicone liners for multiple cake batches?
A: Absolutely! Parchment paper and silicone liners can be reused multiple times, making them eco-friendly and convenient options for preventing sticking.
Q: Are there any additional tips for ensuring my cakes release perfectly from the pan every time?
A: Using quality bakeware, following recipe instructions accurately, and greasing pans generously yet evenly are key factors in achieving consistently non-stick cake baking results.
Conclusion
To conclude, preventing cakes from sticking to the pan is crucial for achieving perfect results.
By following the tips and techniques discussed, such as greasing and flouring the pan, using parchment paper, adjusting baking times, and allowing the cake to cool properly before removing it, you can ensure that your cakes come out of the pan easily and beautifully intact.
These simple yet effective methods will not only save your cakes from sticking but also elevate your baking experience, allowing you to enjoy delicious, perfectly shaped cakes every time.
Other Articles You May Also Like:
- How To Get Cake Out Of Bundt Pan (5 Revealing Tips)
- How To Get Bread Out Of Pan (8 Cool Ways)
- How To Get Toffee Out Of Glass Pan (11 Best Tips)
- How To Get Fudge Out Of Glass Pan (8 Easy Ways)
- How To Bake With Silicone Pans (7 Mind-Blowing Steps)
- How To Clean Baking Sheets (6 Easy Ways)
- How To Make Cupcakes Without Cupcake Pan (7 Surprising Ways)
- How To Make Donuts Without A Donut Pan (4 Surprising Substitutes)
- How To Grease A Pan (7 Cool Ways)