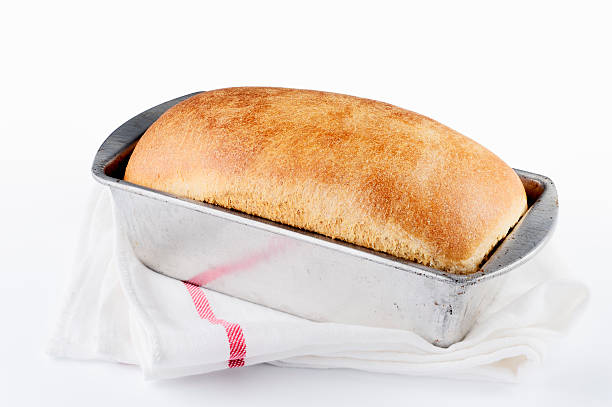
In the culinary realm, few things evoke the warm embrace of home quite like the aroma of freshly baked bread wafting through the kitchen.
Yet, for all the satisfaction that comes from pulling a perfectly baked loaf from the oven, the battle to liberate it from the confines of its pan can sometimes resemble a medieval siege.
Fear not, for within these words lies the secret passage to bread liberation—a tale of technique, finesse, and perhaps a dash of wizardry.
So, dear baker, arm yourself with patience and an adventurous spirit as we embark on a journey to master the art of coaxing bread from its metallic fortress.
How To Get Bread Out Of Pan
Here is a step-by-step process on how to get bread out of a pan:
Allow the Bread to Cool
Before attempting to remove the bread from the pan, it’s crucial to let it cool down. Hot bread is more prone to breaking apart, and removing it from the pan while it’s hot can deform or tear it.
Loosen the Edges
Take a butter knife or a spatula and carefully run it around the edges of the bread. This will help loosen any parts of the bread that may be stuck to the sides of the pan.
Turn the Pan Upside Down
Place a clean kitchen towel or a cooling rack on top of the pan. Then, using oven mitts or kitchen towels to protect your hands, firmly hold both the pan and the towel or rack together, and flip them over so the pan is upside down.
Tap the Bottom
Gently tap the bottom or sides of the pan to help release the bread. Gravity, combined with the tapping motion, should encourage the bread to slide out of the pan onto the towel or cooling rack.
Lift Off the Pan
Carefully lift the pan away from the bread. If the bread doesn’t come out easily, you can gently shake or tap the pan again to help release it. Be patient and avoid forcing the bread out, as this could cause it to break.
Allow the Bread to Cool Further
Once the bread is out of the pan, allow it to cool completely on the cooling rack or towel before slicing or serving. Cutting into hot bread can cause it to become gummy and lose its shape.
Clean the Pan
After removing the bread, wash the pan with warm, soapy water to remove any residue. If there are stubborn bits of bread stuck to the pan, you can soak it in warm water to help loosen them before washing.
Enjoy Your Bread
Once the bread has cooled and the pan is clean, you’re ready to enjoy your freshly baked loaf! Whether you slice it up for sandwiches, toast it for breakfast, or serve it alongside a meal, homemade bread is always a treat.
Understanding the Bread-Pan Relationship
Types of Pans and Their Impact
When it comes to baking bread, the type of pan you use can significantly impact the outcome. Various pans, such as metal, glass, and silicone, offer different heat conductivity and retention properties.
Metal pans, typically made of aluminum or steel, conduct heat efficiently, resulting in a faster baking process and a crispier crust. Glass pans, on the other hand, distribute heat more evenly but may require longer baking times.
Silicone pans provide flexibility and non-stick properties, ideal for delicate bread types like brioche.
Factors Influencing Bread Adhesion
The adhesion of bread to the pan can be influenced by several factors. The type of pan surface, whether it’s non-stick or not, plays a crucial role. Non-stick surfaces reduce the likelihood of bread sticking to the pan, making it easier to remove after baking.
The greasing method and the recipe’s ingredients, such as fat content and sugar levels, can affect adhesion. Higher fat content and sweeter doughs tend to stick more, requiring thorough greasing and flouring of the pan.
The Role of Proper Greasing
Properly greasing the bread pan is essential for preventing sticking and ensuring easy release of the baked loaf. Begin by selecting an appropriate fat for greasing, such as butter, oil, or shortening, depending on personal preference and dietary restrictions.
Using a pastry brush or paper towel, evenly coat the interior surfaces of the pan, ensuring complete coverage. For added insurance against sticking, dust the greased pan with a thin layer of flour, tapping out any excess.
This combination creates a barrier between the bread and the pan, facilitating smooth release and preserving the loaf’s shape.
Preparation Phase
Choosing the Right Pan
Selecting the appropriate pan is the first step towards successful bread baking. Consider factors such as the type of bread you’re making, desired crust texture, and baking time.
Metal pans, like aluminum or steel, are excellent for achieving a crispy crust and faster baking due to their heat conductivity. Glass pans distribute heat more evenly but may require longer baking times.
Silicone pans offer flexibility and easy release but may not provide as much browning. Choose a pan that suits your bread recipe and baking preferences.
Properly Greasing the Pan
Greasing the pan is essential to prevent the bread from sticking and ensure easy removal after baking. Begin by selecting a suitable fat such as butter, oil, or shortening.
Use a pastry brush or paper towel to evenly coat the interior surfaces of the pan, ensuring thorough coverage. Pay special attention to corners and edges where bread tends to stick.
For added insurance, lightly dust the greased pan with flour, tapping out any excess. This step creates a protective barrier between the bread and the pan, facilitating smooth release.
Using Parchment Paper or Non-Stick Liners
For added convenience and assurance against sticking, consider using parchment paper or non-stick liners. Line the bottom and sides of the pan with parchment paper, leaving an overhang for easy lifting after baking.
Alternatively, non-stick liners specially designed for baking provide an extra layer of protection against sticking. These liners are available in pre-cut sizes or rolls that can be trimmed to fit your pan perfectly.
Using parchment paper or non-stick liners not only simplifies cleanup but also ensures effortless release of the baked bread without any residue.
Techniques for Bread Removal
Cooling and Loosening
Once your bread is baked to perfection, it’s essential to let it cool in the pan for a few minutes. This short cooling period helps the bread settle and firm up slightly, making it easier to handle without breaking apart.
After cooling, gently run a butter knife or offset spatula around the edges of the bread to loosen it from the sides of the pan. This step helps prevent the bread from sticking to the pan and ensures a smooth release.
Inverting and Tapping
Carefully invert the bread pan onto a clean surface or wire rack. If you’ve greased and floured the pan properly, the loaf should slide out effortlessly. If the bread seems to stick, gently tap the bottom or sides of the pan to encourage release. Be cautious not to apply too much force, as it could damage the loaf’s shape or texture.
Using Parchment Paper
For added insurance against sticking, consider lining the bottom and sides of the bread pan with parchment paper before adding the dough.
The parchment paper creates a protective barrier between the bread and the pan, ensuring easy removal after baking. Once the bread is baked, simply lift the parchment paper to release the loaf, then peel it away gently.
Cooling Completely
For best results, allow the bread to cool completely before slicing. Cooling allows the bread’s structure to set fully, reducing the risk of it crumbling or tearing during slicing.
Although it might be tempting to slice into a warm loaf, exercising patience ensures beautifully uniform slices without compromising texture or flavor.
Storage and Preservation
Once cooled and sliced, store the bread in an airtight container or resealable plastic bag to maintain freshness. Proper storage helps preserve the bread’s moisture and prevents it from drying out or becoming stale too quickly. Consider freezing any leftover bread for future use, either as whole loaves or pre-sliced portions, to extend its shelf life.
Troubleshooting Common Issues
Sticking: Causes and Solutions
Sticking bread can be frustrating, but understanding its causes can help prevent this issue. Insufficient greasing or improper greasing technique is a common culprit.
Ensure thorough coverage of the pan with butter, oil, or non-stick spray, and consider dusting with flour for added insurance. Using old or damaged pans with scratched surfaces can exacerbate sticking.
Invest in quality pans and replace them when signs of wear appear. Overbaking or letting the bread cool too long in the pan can also lead to sticking. Remove the bread promptly after cooling for a few minutes, and gently loosen it from the pan’s edges before attempting to remove it.
Bread Breakage
Bread breakage often occurs due to mishandling during removal. To minimize breakage, ensure the bread has cooled sufficiently in the pan before attempting to remove it.
Use proper tools like spatulas or knives to gently loosen the bread from the pan’s edges, avoiding excessive force. If the bread is still warm, allow it to cool further to firm up before slicing.
Slicing bread with a dull or improper knife can also cause breakage. Invest in a quality bread knife with a serrated edge to achieve clean, even slices without damaging the loaf’s structure.
Crumbly Texture
A crumbly texture in bread can result from various factors, including incorrect ingredient proportions, overmixing, or underbaking.
Follow the recipe’s instructions carefully, paying attention to measurements and mixing times. Overmixing can develop excess gluten, leading to a tough or crumbly texture. Mix until just combined to avoid this issue.
Underbaking can also result in a crumbly texture, as the bread may not have had sufficient time to set and develop structure. Ensure thorough baking by testing the bread’s internal temperature or tapping the bottom for a hollow sound.
Uneven or Partial Release
Uneven or partial release of bread from the pan can occur if the pan is not properly greased or if the bread is not fully baked. Ensure thorough greasing of the pan’s surfaces and consider using parchment paper for added insurance against sticking.
Ensure the bread is baked to completion before attempting to remove it from the pan. A partially baked loaf may not have sufficient structure to release cleanly. Use a toothpick or cake tester to check for doneness, ensuring it comes out clean from the center of the loaf.
Advanced Tips for Perfect Bread Removal
Preparing the Pan
Before pouring in the bread dough, consider lining the bottom of the pan with parchment paper for effortless removal. Additionally, lightly grease the sides and corners of the pan, ensuring thorough coverage to prevent sticking.
Greasing Technique
Opt for a pastry brush to evenly distribute the grease across the pan’s surface. Ensure the entire interior of the pan is coated with a thin layer of grease, paying extra attention to the corners and edges where bread is more likely to stick.
Flouring Strategically
After greasing the pan, lightly dust it with flour, tapping out any excess. This technique creates a protective barrier between the bread and the pan, further reducing the risk of sticking. Use a fine mesh sieve for even distribution of flour.
Cooling Method
Once the bread is baked, allow it to cool in the pan for a few minutes to set. Then, carefully invert the pan onto a wire rack or clean surface. Avoid leaving the bread in the pan for too long after baking, as it can lead to condensation buildup and sticking.
Using Gravity
Let gravity do some of the work by gently tapping the bottom or sides of the pan to encourage the bread’s release. A few gentle taps can help loosen the loaf without the need for excessive force or manipulation.
Cooling Rack Technique
Place a cooling rack upside down on top of the inverted pan and flip them together. This method allows the bread to slide out smoothly onto the rack, minimizing handling and reducing the risk of breakage.
Patience and Precision
Exercise patience and precision when removing the bread from the pan. Rushing the process or using excessive force can result in misshapen loaves or breakage. Take your time and handle the bread with care to preserve its integrity.
Practice Makes Perfect
Perfecting the art of bread removal may require some trial and error. Experiment with different techniques, pans, and greasing methods to find what works best for your baking preferences and equipment.

Safety Considerations for Bread Removal
Heat Protection
Always use oven mitts or heat-resistant gloves when handling hot pans or trays, especially when removing bread from the oven. Hot surfaces can cause burns or injuries if touched without proper protection.
Sharp Utensils
Exercise caution when using sharp tools such as knives or spatulas to loosen bread from the pan. Handle these tools carefully to avoid accidental cuts or injuries, especially when working with slippery or sticky dough.
Steam Hazards
Be cautious when using hot towels or water to loosen stuck bread from the pan. Steam can cause burns if it comes into contact with skin. Use oven mitts or heat-resistant gloves and keep a safe distance to prevent accidental burns.
Sturdy Surfaces
Ensure you place the hot pan or tray on a stable and heat-resistant surface when removing bread from the oven. Avoid placing it on surfaces that may melt or catch fire, such as plastic countertops or oven mitts.
Proper Cooling
Allow the bread and pan to cool sufficiently before attempting to remove the bread. Rushing the process may lead to accidental burns or injuries caused by handling hot pans or trays.
Ventilation
Ensure adequate ventilation in the kitchen to prevent the accumulation of steam or smoke during the baking process. This helps maintain a safe environment and reduces the risk of respiratory issues or fire hazards.
Child Safety
Keep children and pets away from the kitchen area, especially when handling hot pans or trays. Educate them about the potential dangers of hot surfaces and sharp tools to prevent accidents or injuries.
Read Instructions
Follow the manufacturer’s instructions and safety guidelines when using baking equipment, such as pans, trays, or appliances. This ensures safe and proper use of the equipment, minimizing the risk of accidents or injuries.

Frequently Asked Questions (FAQs) – Getting Bread Out Of Pan
Q: What’s the best way to ensure my homemade bread effortlessly releases from the pan?
A: Fear not! Simply allow your bread to cool slightly before gently running a butter knife around the edges. This trick ensures a smooth release every time, leaving your loaf intact and your spirits high!
Q: I’m worried about ruining my freshly baked bread when removing it from the pan. Any tips to avoid mishaps?
A: Worry not, dear baker! Patience is key. Let your bread cool for a few minutes, then gently tap the bottom of the pan. With a little coaxing, your masterpiece will slide out gracefully, leaving you with a picture-perfect loaf and a heart full of pride.
Q: Sometimes my bread sticks to the pan, leaving me with a crumbly mess. Any suggestions for a smoother process?
A: Don’t let sticky situations dim your baking enthusiasm! Try greasing your pan generously before baking or lining it with parchment paper. This simple step guarantees a flawless release, allowing your bread to shine and your kitchen to smell heavenly.
Q: I’ve heard horror stories of bread getting stuck and losing its shape. Is there a foolproof method to prevent this?
A: Leave your worries behind and embrace the joy of baking! Opt for non-stick pans or invest in silicone molds for easy removal. With these tools in hand, your bread will pop out effortlessly, preserving its delightful form and leaving you with nothing but smiles.
Q: What’s the secret to achieving that satisfying moment when the bread slides out of the pan effortlessly?
A: Ah, the magical moment of bread liberation! Simply let your loaf cool for a bit, then gently tilt the pan and let gravity do the work. With a little finesse, you’ll witness your creation gliding out with grace, ready to be admired and devoured with delight.
Q: I often struggle with removing bread from the pan without it crumbling. Any tips for a more successful extraction?
A: Fear not, for a solution is at hand! Allow your bread to cool slightly, then loosen the edges with a silicone spatula or a gentle shake. Embrace the anticipation as your bread releases effortlessly, maintaining its shape and texture for a truly satisfying outcome.
Conclusion
In conclusion, mastering the art of removing bread from a pan is a skill that not only ensures the preservation of the bread’s integrity but also enhances the overall baking experience.
By employing the techniques outlined, such as proper greasing, cooling, and gentle manipulation, one can effortlessly release bread from its pan, achieving perfectly baked loaves every time.
With patience, practice, and attention to detail, this seemingly simple task becomes an integral part of the baking process, contributing to the enjoyment and satisfaction of creating homemade bread.
Other Articles You May Also Like: