Getting a cake out of the pan can be as nerve-wracking as waiting for it to bake to perfection. The tantalizing aroma fills your kitchen, but the real magic happens when you slide that cake out, revealing its flawless form.
It’s like unwrapping a sweet surprise, but without the anxiety of it sticking to the pan! Mastering the art of releasing a cake from its confines is not just about technique; it’s about knowing the secrets that turn a potentially sticky situation into a smooth, effortless delight.
So, if you’re ready to elevate your baking game and impress with flawless cakes every time, let’s dive into the world of how to get a cake out of the pan like a pro!
How To Get A Cake Out Of The Pan
Getting a cake out of the pan cleanly and intact is essential for presentation and serving. Here are four tips to help you achieve this:
1. Use the Right Pan
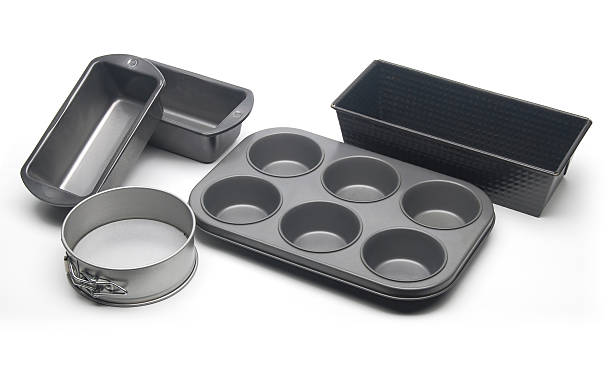
Using the right pan is crucial for getting a cake out cleanly and without sticking. Here’s a detailed explanation of why the right pan matters and what types of pans are best for easy cake removal:
Non-Stick Pans
- Non-stick pans are specifically designed to prevent food from sticking to the surface during cooking and baking. When it comes to cakes, using a non-stick pan can significantly reduce the chances of the cake sticking to the sides or bottom of the pan. These pans are usually coated with materials like Teflon or ceramic that create a smooth, slippery surface.
Well-Greased and Floured Pans
- If you don’t have a non-stick pan or prefer to use a traditional pan, ensuring it is well-greased and floured is essential. Greasing the pan with butter, oil, or baking spray creates a barrier between the cake batter and the pan, making it easier to release the cake after baking. Dusting the greased pan with flour helps create an additional non-stick layer and prevents the cake from sticking.
Parchment Paper Lining
- Another effective method for easy cake removal is lining the bottom of the pan with parchment paper. Cut a piece of parchment paper to fit the bottom of the pan, then place it before pouring the cake batter. Once the cake is baked and cooled slightly, you can lift it out of the pan using the edges of the parchment paper.
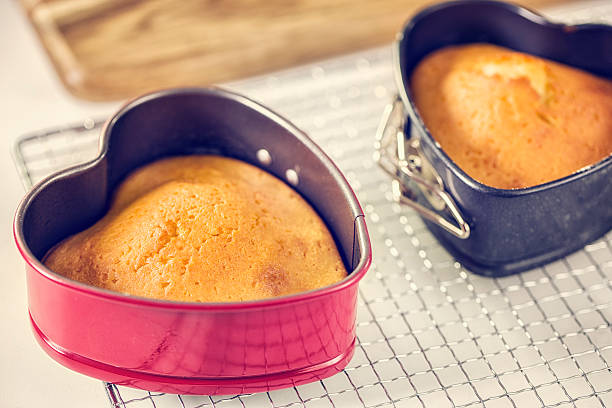
Silicone Cake Pans
- Silicone cake pans are becoming increasingly popular due to their flexibility and non-stick properties. These pans are made from food-grade silicone, which is heat-resistant and naturally non-stick. Silicone pans can be easily flexed to release the cake without damaging its shape. They are also dishwasher safe and durable for long-term use.
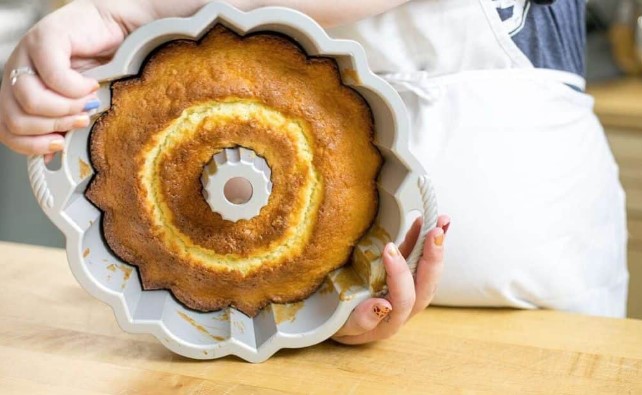
Bundt Pans with Non-Stick Coating
- Bundt pans have intricate designs and ridges that can make cake removal challenging. Using a bundt pan with a non-stick coating or ensuring it is well-greased and floured is important for easy release. Some bundt pans also come with a removable bottom, making it easier to take the cake out without disturbing its decorative shape.
Concisely, choosing the right pan, whether it’s a non-stick pan, well-prepared traditional pan, silicone pan, or bundt pan with a non-stick coating, plays a key role in getting a cake out of the pan smoothly. Each type of pan has its advantages, so consider your preferences and the type of cake you’re baking when selecting the best pan for easy cake removal.
2. Prepare the Pan Properly
Preparing the pan properly is a critical step in ensuring that your cake comes out cleanly and without sticking. Here’s a detailed guide on how to prepare the pan effectively:
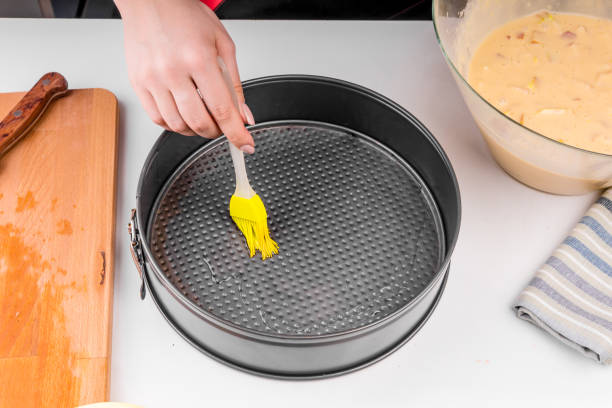
Greasing the Pan
- Use a pastry brush or paper towel to evenly coat the bottom and sides of the pan with butter, oil, or baking spray. Make sure to reach into any crevices or corners of the pan to create a complete non-stick surface. Using a non-stick cooking spray with flour added can also be beneficial, as it combines greasing and flouring in one step.
Flouring the Pan
- After greasing, lightly dust the greased surface with flour. Tap and rotate the pan to distribute the flour evenly and shake off any excess. The flour creates an additional barrier between the cake batter and the pan, reducing the chances of sticking.
Using Parchment Paper
- For extra insurance against sticking, consider lining the bottom of the pan with parchment paper. Cut a piece of parchment paper to fit the bottom of the pan, then place it after greasing and flouring. The parchment paper provides a smooth, non-stick surface for easy cake removal.
Applying Pan Release Paste
- Pan release paste is a homemade mixture of equal parts of flour, vegetable oil, and shortening. Mix these ingredients until you get a smooth paste. Use a pastry brush to apply the paste to the pan’s interior, covering all surfaces evenly. This paste creates a non-stick layer that helps the cake release easily.
Using Non-Stick Spray with Flour
- Non-stick cooking sprays that contain flour are designed specifically for baking and provide a convenient way to grease and flour the pan in one step. Simply spray the pan with the non-stick spray, ensuring even coverage, and then proceed with pouring the cake batter.
Chilling the Greased Pan
- After greasing and flouring the pan, you can further enhance its non-stick properties by chilling it in the refrigerator for a few minutes. The cold temperature helps solidify the grease and flour layers, creating a more stable non-stick surface.
By following these steps to prepare the pan properly, you create a non-stick barrier that reduces the risk of the cake sticking during baking. This ensures that your cake can be easily released from the pan, maintaining its shape and appearance for serving.
3. Bake The Cake Well
Baking the cake well is crucial not only for its flavor and texture but also for ensuring that it releases easily from the pan. Here are detailed steps on how to bake the cake properly to facilitate easy removal from the pan:
Preheat the Oven
- Before you start preparing the cake batter, preheat your oven to the temperature specified in your recipe. This allows the oven to reach the desired baking temperature, ensuring even cooking and proper rising of the cake.
Prepare the Cake Batter
- Follow your cake recipe carefully to prepare the batter. Mix the ingredients thoroughly according to the recipe’s instructions, ensuring there are no lumps and the batter is smooth and well-combined.
Pour the Batter Into the Prepared Pan
- Once your cake batter is ready, pour it into the prepared pan. Use a spatula to spread the batter evenly, ensuring it reaches all corners and edges of the pan.
Level the Batter
- To ensure even baking and a level cake surface, gently tap the filled pan on the countertop to remove any air bubbles. You can also use a spatula or the back of a spoon to level the surface of the batter.
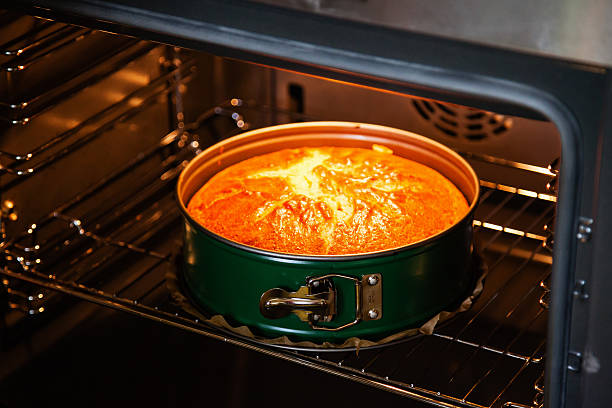
Place the Pan in the Oven
- Carefully place the filled cake pan in the preheated oven. Position it in the center of the oven for even heat distribution. Avoid placing the pan too close to the oven walls or heating elements, as this can cause uneven baking.
Monitor Baking Time
- Follow the baking time recommended in your recipe. Avoid opening the oven door frequently during baking, as this can cause fluctuations in temperature and affect the cake’s texture and rise. Use a timer to track the baking time accurately.
Perform the Toothpick Test
- Towards the end of the recommended baking time, insert a clean toothpick into the center of the cake. If it comes out clean or with a few moist crumbs (not raw batter), the cake is done. If the toothpick has wet batter clinging to it, continue baking for a few more minutes and test again.
By following these steps and baking the cake properly, you ensure that it is cooked evenly, rises well, and releases easily from the pan, resulting in a beautifully presented and delicious cake.
4. Cool The Cake
Cooling the cake properly is an essential step in the baking process that ensures the cake sets and firms up, making it easier to remove from the pan without breaking. Here’s a detailed guide on how to cool the cake effectively:
Remove from the Oven
- Once the cake is fully baked and passes the toothpick test (a clean toothpick inserted into the center comes out clean or with a few moist crumbs), turn off the oven and carefully remove the cake from the oven using oven mitts or kitchen towels to protect your hands.
Allow to Cool in the Pan
- Place the hot cake pan on a heat-resistant surface like a wire cooling rack or a trivet. Let the cake cool in the pan for about 10 to 15 minutes. This initial cooling period helps the cake to contract slightly, making it easier to release from the pan.
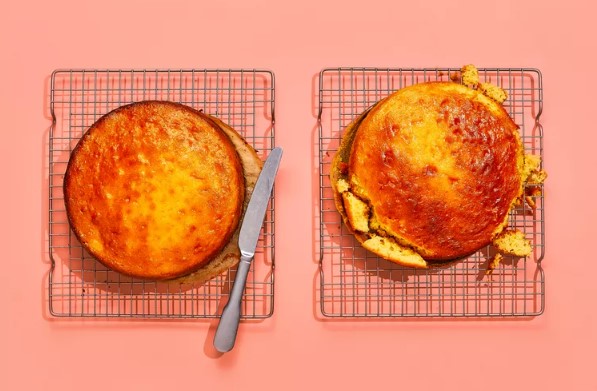
Loosen the Edges
- After the initial cooling period, run a thin knife or offset spatula around the edges of the cake. This helps loosen any areas where the cake might be sticking to the pan.
Invert onto a Cooling Rack
- Prepare a clean wire cooling rack by placing it upside down over the top of the cake pan. Using oven mitts or kitchen towels, hold the cooling rack and the cake pan together firmly and invert them together. Gently lift the cake pan off the cake. If you lined the pan with parchment paper, carefully peel it away from the cake at this stage.
Complete Cooling
- Allow the cake to cool completely on the wire cooling rack. This can take anywhere from 1 to 2 hours, depending on the size and thickness of the cake. Avoid moving or handling the cake too much while it’s cooling to prevent it from cracking or breaking.
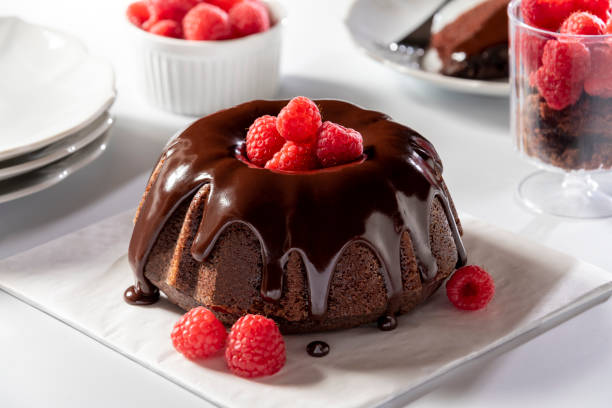
Frost or Decorate (Optional)
- Once the cake has cooled completely, you can frost or decorate it as desired. If you plan to frost the cake, make sure it is completely cooled to prevent the frosting from melting or becoming too soft.
Serve or Store
- After frosting or decorating, you can serve the cake immediately or store it in an airtight container at room temperature or in the refrigerator, depending on the type of frosting and the ingredients used in the cake.
By following these steps to cool the cake properly, you ensure that it maintains its shape, texture, and moisture while also making it easier to handle and serve.
What If The Cake Sticks?
If the cake sticks to the pan despite your best efforts in greasing, flouring, and cooling, there are several steps you can take to salvage the situation.
First, allow the cake to cool completely in the pan after removing it from the oven. Trying to remove a hot or warm cake can cause it to break apart.
Once the cake is cooled, run a thin knife or offset spatula around the edges of the pan again to loosen any stuck areas. If the cake still doesn’t release easily, you can try gently warming the bottom of the pan.
Place a towel soaked in hot water or a warm, damp cloth under the pan for a few minutes. The heat can help soften any hardened edges of the cake and make it easier to remove.
Another method is to carefully heat the bottom of the pan over low heat on the stove for a brief period, being cautious not to overheat or burn the cake.
After warming, invert the pan onto a flat surface and tap gently to encourage the cake to release. If some parts of the cake remain stuck, use a spatula or knife to carefully pry them away from the pan.
It’s essential to be patient and gentle during this process to avoid damaging the cake’s texture or appearance. If the cake is still too stuck to salvage, consider turning it into a trifle, cake pops, or using it as a base for a dessert parfait.
These creative solutions can transform a stuck cake into a delicious treat without letting any baking efforts go to waste.
Frequently Asked Questions (FAQs) – How To Get A Cake Out Of The Pan
Q: How can I ensure my cake comes out of the pan easily without sticking?
A: To make sure your cake releases effortlessly, generously grease the pan with butter or cooking spray, and consider lining the bottom with parchment paper for added insurance.
Q: What’s the best way to prevent my cake from sticking to the sides of the pan?
A: Using a non-stick pan or coating the sides with flour after greasing can help your cake slide out smoothly without clinging to the edges.
Q: Is there a trick to getting a perfectly shaped cake out of the pan intact?
A: Yes, allowing the cake to cool for a few minutes after baking before gently running a knife along the edges can help release it without breaking or losing its shape.
Q: Can I use any type of pan to bake a cake, or are certain pans easier to release the cake from?
A: While you can use various pans, non-stick pans or silicone pans often make it easier to remove the cake due to their smooth surfaces and flexibility.
Q: I’m worried about my cake crumbling when I try to remove it from the pan. Any tips to avoid this?
A: Letting the cake cool completely before attempting to remove it and using a cooling rack to invert the pan can help prevent crumbling and ensure a clean release.
Q: Should I flip the cake onto a plate or a cooling rack to get it out of the pan?
A: It’s generally recommended to flip the cake onto a plate first, then onto a cooling rack if needed, as this reduces the risk of damaging the cake during the transfer.
Q: What if my cake is stuck in the pan despite greasing and cooling?
A: If the cake sticks, gently tap the bottom and sides of the pan, or warm the bottom of the pan slightly to loosen the cake without damaging it.
Q: Can I use a different method besides greasing to ensure my cake doesn’t stick to the pan?
A: Yes, you can dust the greased pan with cocoa powder or finely ground nuts instead of flour for added flavor and a non-stick coating.
Q: How long should I wait after baking before trying to remove the cake from the pan?
A: Letting the cake cool in the pan for about 10-15 minutes allows it to set slightly and makes it easier to release without collapsing or breaking apart.
Conclusion
Getting a cake out of the pan successfully is a culmination of careful preparation, patience, and the right techniques.
By following the steps outlined in this guide, you can ensure that your cakes come out beautifully and intact, ready to be enjoyed by family and friends.
Remember to let the cake cool sufficiently, use appropriate greasing or parchment paper, and employ gentle tapping or shaking methods.
With these tips and a little practice, you’ll master the art of releasing cakes from pans effortlessly, adding a delightful finishing touch to your baking endeavors.
Other Articles You May Also Like:
- How To Get Cake Out Of Bundt Pan (5 Revealing Tips)
- How To Get Fudge Out Of Glass Pan (8 Easy Ways)
- How To Get Toffee Out Of Glass Pan (11 Best Tips)
- How To Get Bread Out Of Pan (8 Cool Ways)
- How To Keep Cake From Sticking To Pan (9 Surprising Ways To Know)
- How To Make Cupcakes Without Cupcake Pan (7 Surprising Ways)
- Can You Make Cheesecake Without A Springform Pan (10 Surprising Substitutes)