Embarking on a culinary adventure often begins with the clinking of measuring spoons and the aromatic promise of freshly baked delights wafting through the air. Yet, in the realm of baking, innovation whispers a sweet secret: silicone pans.
These flexible, vibrant wonders have revolutionized the baking world, offering a modern twist to traditional metal counterparts. Imagine a world where sticking, uneven baking, and cumbersome cleanup are mere crumbs of the past.
With silicone pans, baking transcends from a chore to a joyous exploration, where creativity knows no bounds and the end result is always a tantalizing treat. So, dust off your apron and prepare to unlock the magic of baking with silicone pans – where simplicity meets sophistication, and every bite tells a story.
What Is A Silicone Pan?
A silicone pan is a kitchen utensil primarily designed for baking and cooking purposes, constructed from food-grade silicone material. Silicone is a synthetic polymer known for its non-stick properties, flexibility, and heat resistance, making it an ideal material for cookware.
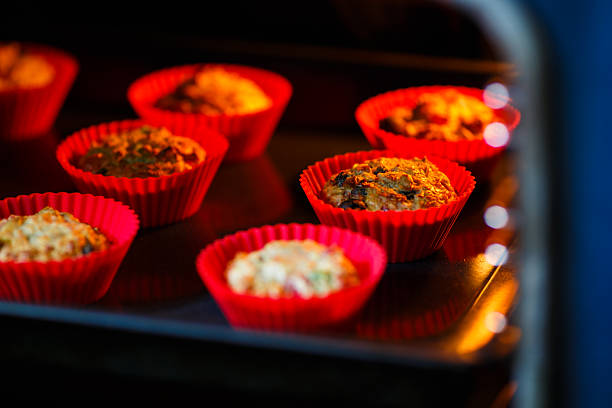
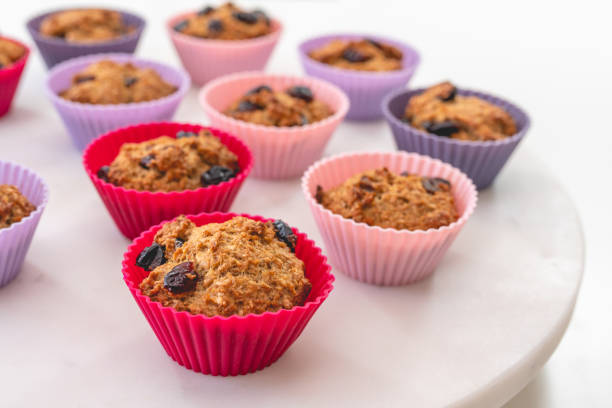
Silicone pans come in various shapes and sizes, including muffin trays, cake molds, loaf pans, and baking sheets. They offer several advantages over traditional metal or glass pans, such as effortless food release, easy cleaning, and the ability to withstand high temperatures without warping or becoming damaged.
Silicone pans are often lightweight and pliable, allowing for convenient storage and handling. Their flexibility also facilitates easy removal of baked goods, reducing the risk of breakage or sticking.
Silicone pans have gained popularity among home cooks and professional chefs alike for their versatility, durability, and user-friendly features, making them a staple in modern kitchens.
How To Bake With Silicone Pans
Baking with silicone pans is relatively straightforward and offers several advantages due to their non-stick properties and flexibility. Here’s a step-by-step guide on how to effectively bake a silicone pans:
Buying Silicone Pans

When purchasing silicone pans, there are several factors to consider to ensure you find the right one for your needs. Firstly, consider the size and shape of the pan, ensuring it matches the type of recipes you frequently prepare.
Whether you’re baking muffins, cakes, or bread, there are silicone pans available in various sizes and configurations to accommodate different recipes. Check the temperature resistance of the silicone pan to ensure it can withstand the heat levels required for your baking or cooking endeavors.
Look for pans labeled as food-grade silicone, indicating they are safe for use with food and free from harmful chemicals. Consider the pan’s flexibility and sturdiness; while silicone pans are generally flexible for easy release, you’ll want one with enough structure to support your baked goods during handling.
Lastly, read reviews and consider the brand reputation to ensure you’re investing in a high-quality silicone pan that will last for years to come. By carefully considering these factors, you can confidently select the perfect silicone pan to elevate your baking and cooking experiences.
Preparation
Preparing silicone pans for use is a simple yet essential step to ensure optimal performance and longevity. Begin by thoroughly washing the silicone pan with warm, soapy water to remove any dust, residues, or manufacturing impurities that may be present.
Rinse the pan well under running water and dry it completely with a clean towel or air dry it. While silicone pans are naturally non-stick, lightly greasing them with cooking spray, butter, or oil can further enhance their release properties, especially for recipes with low-fat content.
Alternatively, you can dust the pan with flour for baking to prevent sticking. Once greased, the silicone pan is ready to be filled with your desired batter or mixture. Ensure not to overfill the pan, leaving some space at the top to accommodate rising during baking.
By properly preparing your silicone pan, you can ensure easy release of your baked goods and effortless cleanup afterward, enhancing your overall baking experience.
Filling

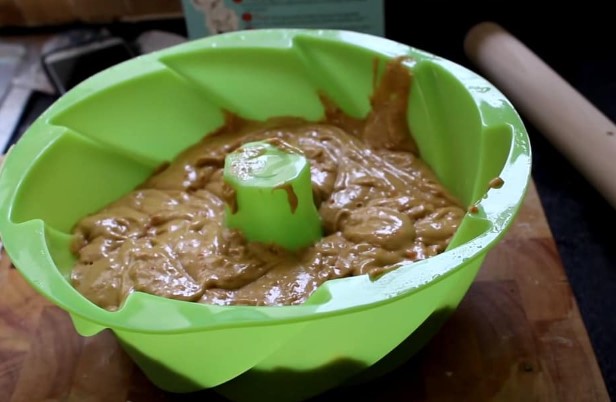
Filling a silicone pan is a straightforward process that begins once the pan is prepared and ready for use. Once you’ve cleaned and greased your silicone pan as needed, it’s time to fill it with your desired batter or mixture.
Whether you’re making muffins, cakes, bread, or any other baked goods, ensure that you evenly distribute the batter or mixture into each cavity or compartment of the pan. Use a spoon, spatula, or piping bag to carefully fill each section, being mindful not to overfill to prevent spillage or uneven baking.
Leave some space at the top of each cavity to allow for expansion during baking, especially for recipes that rise significantly. If you’re using a larger silicone cake or bread pan, spread the batter evenly across the surface, ensuring it reaches all corners and edges for uniform baking.
Once the pan is filled, gently tap it on the countertop to release any air bubbles and level the batter. With the pan properly filled, it’s ready to be transferred to the oven for baking, where the silicone material will distribute heat evenly, resulting in perfectly baked treats.
Baking
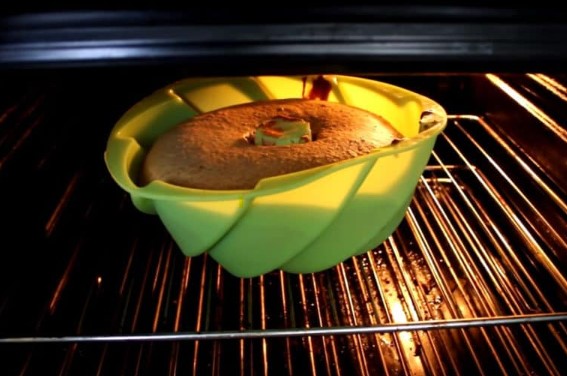
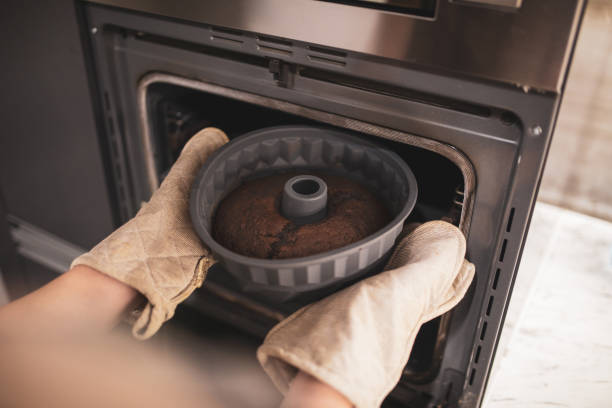
Baking with silicone pans is a convenient and straightforward process that yields excellent results. Once your silicone pan is filled with batter or mixture, it’s time to transfer it to the oven for baking.
Preheat your oven to the temperature specified in your recipe, ensuring it’s fully heated before placing the pan inside. Silicone pans are typically oven-safe and can withstand a wide range of temperatures, making them suitable for various baking needs.
Place the filled silicone pan on a sturdy baking sheet or tray to provide support and stability during baking. This step also helps prevent any potential spillage or deformation of the pan. Position the baking sheet in the center of the oven for even heat distribution.
Set a timer based on the recommended baking time in your recipe, keeping in mind that silicone pans may bake slightly faster than traditional pans due to their heat-conducting properties. While baking, avoid opening the oven door frequently to prevent heat loss and maintain a consistent temperature.
Keep an eye on your baked goods as they near the end of the baking time, using visual cues such as golden brown edges or a toothpick inserted into the center coming out clean to determine doneness. Once fully baked, carefully remove the silicone pan from the oven using oven mitts or heat-resistant gloves to prevent burns.
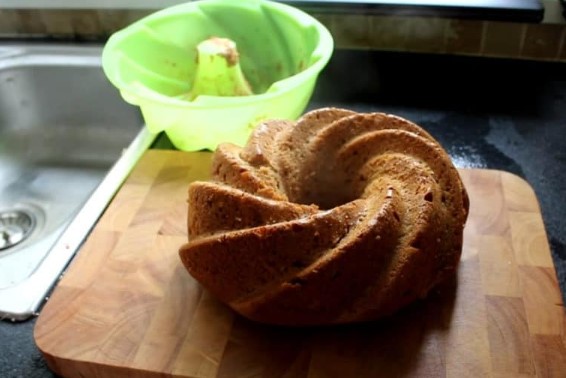
Allow your baked treats to cool in the silicone pan for a few minutes on a wire rack before gently releasing them. The flexibility of silicone makes it easy to bend or twist the pan, helping to release the baked goods effortlessly. For cakes and bread, run a knife along the edges to loosen them before carefully flipping the pan over to release the contents.
With proper baking techniques, your silicone pan will consistently deliver perfectly baked treats with ease, making it a valuable tool in your kitchen arsenal.
Cooling and Removal
After baking, the cooling and removal process is crucial to ensure your baked goods maintain their shape and texture. Once you’ve removed the silicone pan from the oven, place it on a heat-resistant surface or wire rack to cool. Allowing your baked goods to cool in the pan for a few minutes helps them set and firm up, making them easier to handle and release.
During this cooling period, resist the temptation to remove the baked goods immediately from the silicone pan. Instead, let them cool for about 5 to 10 minutes to ensure they have adequately set. This also prevents the risk of burning yourself or damaging the baked goods by handling them too soon.
After the cooling period, gently press on the bottom or edges of the silicone pan to release any air pockets and loosen the baked goods. The flexibility of silicone makes it easy to bend or twist the pan, aiding in the effortless removal of your treats. For cakes, cupcakes, or muffins, you may need to run a butter knife or offset spatula along the edges to help release them from the pan.
Once the baked goods are loosened, carefully invert the silicone pan over a clean surface or wire rack and gently tap or shake it to release the treats. If necessary, you can flex the pan slightly to aid in the removal process. With patience and care, your baked goods should easily pop out of the silicone pan, leaving you with perfectly formed treats.
Allow your baked goods to cool completely on the wire rack before serving or storing them. This ensures they reach the optimal temperature and texture for enjoyment. With proper cooling and removal techniques, you can achieve consistently delicious results every time you bake with your silicone pan.
Cleaning

Cleaning silicone pans is a simple and hassle-free process, thanks to their non-stick properties and dishwasher-safe design. After you’ve removed your baked goods and allowed the pan to cool completely, it’s time to clean it.
Start by rinsing the silicone pan under warm water to remove any loose crumbs or residue. If there are stubborn bits stuck to the pan, use a soft sponge or brush to gently scrub the surface with mild dish soap. Avoid using abrasive cleaners or scouring pads, as they can damage the silicone material.
Once the pan is clean, rinse it thoroughly to remove any soap residue. Silicone pans are typically dishwasher safe, so you can place them on the top rack of your dishwasher for a thorough cleaning. Alternatively, you can hand wash the pan with warm, soapy water and a sponge.
After cleaning, ensure the silicone pan is completely dry before storing it to prevent any moisture buildup or odors. You can air dry it or use a clean towel to pat it dry. Avoid stacking silicone pans on top of each other when storing them, as this can cause deformation or sticking.
Regular cleaning and proper maintenance will help prolong the lifespan of your silicone pans and ensure they remain in good condition for years to come. With their easy-to-clean design, silicone pans are a convenient and practical addition to any kitchen.
Storage

Proper storage of silicone pans is essential for maintaining their shape, integrity, and functionality over time. After cleaning and drying your silicone pan thoroughly, store it in a cool, dry place away from direct sunlight.
Avoid stacking multiple silicone pans on top of each other, as this can cause deformation or sticking. Instead, store them upright or side by side to prevent any unnecessary pressure on the pans.
If you have limited space, consider hanging the silicone pans from hooks or storing them in a cabinet with dividers to keep them organized and easily accessible. Ensure the silicone pan is completely dry before storing it to prevent any moisture buildup, which can lead to mold or mildew growth.
By following these storage tips, you can prolong the lifespan of your silicone pans and keep them in excellent condition for many baking adventures to come.
Other Baking Tips And Tricks You Might Want To Keep In Mind
Certainly! Here are some additional baking tips and tricks to enhance your baking experience:
Room Temperature Ingredients
Room temperature ingredients play a crucial role in achieving optimal texture and consistency in baked goods. Bringing ingredients like eggs, butter, and dairy to room temperature before using them in recipes allows for better incorporation and a smoother batter or dough.
Room temperature eggs whip up more efficiently, incorporating air into batters for lighter cakes and fluffier baked goods. Softened butter blends more evenly with other ingredients, resulting in a smoother texture and better emulsification in recipes like cookies and cakes.
Room temperature dairy products, such as milk and yogurt, integrate more seamlessly into batters and doughs, ensuring even distribution of moisture throughout the mixture.
By allowing these ingredients to come to room temperature before baking, you can enhance the overall quality and texture of your homemade treats, resulting in bakery-worthy results every time.
Preheat Your Oven
Preheating your oven is a fundamental step in the baking process that ensures consistent and even cooking of your baked goods. It allows the oven to reach the desired temperature before you introduce your batter or dough, creating the ideal environment for baking.
Preheating is particularly crucial for recipes that require precise temperature control, such as cakes, cookies, and pastries. Without preheating, your baked goods may not rise properly, leading to dense or unevenly cooked results.
Preheating helps activate leavening agents like baking powder and baking soda, which contribute to the structure and texture of your baked treats. To preheat your oven, simply set it to the temperature specified in your recipe and allow it to reach that temperature before inserting your baking pans.
Depending on your oven, preheating typically takes 10 to 20 minutes. By preheating your oven, you set the stage for baking success, ensuring that your creations turn out beautifully every time.
Measure Ingredients Accurately
Accurate measurement of ingredients is a fundamental aspect of successful baking. Using precise measurements ensures consistency in flavor, texture, and overall quality of your baked goods.
When measuring dry ingredients like flour, sugar, and cocoa powder, spoon them into the measuring cup or spoon until they’re slightly overflowing, then level off the excess with a straight edge, such as the back of a knife.
Avoid scooping directly from the container, as it can compact the ingredients and lead to inaccurate measurements. For liquids, use a liquid measuring cup placed on a flat surface and read the measurement at eye level for accuracy.
Invest in a kitchen scale for more precise measurements, especially for ingredients like flour, where weight can vary significantly based on how it’s packed. By measuring ingredients accurately, you can ensure consistent and delicious results with every batch of baked goods.
Sifting Dry Ingredients
Sifting dry ingredients, such as flour, cocoa powder, baking powder, and baking soda, is a simple yet essential step in baking that can greatly impact the texture and consistency of your final product.
Sifting helps break up any lumps or clumps in the dry ingredients and aerates them, resulting in a lighter and more uniform mixture. To sift dry ingredients, place a fine-mesh sieve or a flour sifter over a mixing bowl or directly onto parchment paper.
Then, add the dry ingredients to the sieve or sifter and gently tap or shake it to pass the ingredients through the mesh, allowing them to fall evenly into the bowl below. If a recipe calls for sifted ingredients, it’s essential to sift them before incorporating them into the batter or dough.
However, even if a recipe doesn’t specify sifting, it’s still a good practice to ensure smoother and more consistent results. Sifting dry ingredients is a quick and easy step that can make a big difference in the texture and quality of your baked goods.
Avoid Overmixing
Avoiding overmixing is a crucial tip in baking that can significantly impact the texture and tenderness of your baked goods. Overmixing can lead to gluten development, resulting in tough, dense, or chewy textures, particularly in cakes, muffins, and quick breads.
To prevent overmixing, it’s essential to mix ingredients only until they are just combined. Use a gentle hand when stirring or mixing batter, and stop as soon as there are no visible streaks of flour or other dry ingredients.
For recipes that involve folding in delicate ingredients like whipped egg whites or sifted flour, use a spatula and gently fold them into the batter using a figure-eight motion until evenly incorporated.
Avoid using high-speed settings on electric mixers, as they can easily overmix the batter. Remember that it’s okay if the batter appears slightly lumpy or uneven; overmixing to achieve perfect smoothness can lead to undesirable results.
By exercising restraint and stopping mixing as soon as the ingredients are incorporated, you can ensure tender, moist, and perfectly textured baked goods every time.
Use Parchment Paper
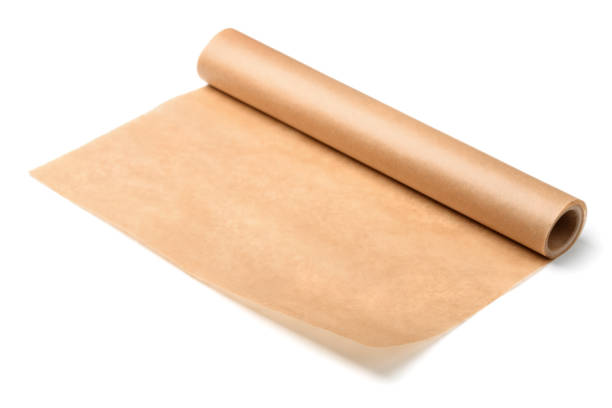
Using parchment paper is a helpful baking tip that can make your baking experience easier and more enjoyable. Parchment paper is a non-stick baking paper that can be used to line baking sheets, cake pans, and other baking dishes.
It helps prevent sticking, making it easier to remove baked goods from the pan without breaking or tearing. Parchment paper creates a barrier between the baked goods and the pan, which can help promote even baking and prevent burning on the bottom.
To use parchment paper, simply cut it to fit the bottom of your baking pan or line the entire pan, depending on the recipe. Place the parchment paper in the pan and then add your batter or dough on top.
Once baked, your baked goods can be easily lifted out of the pan by lifting the edges of the parchment paper. This not only makes cleanup a breeze but also helps preserve the shape and appearance of your baked goods. Overall, using parchment paper is a simple yet effective way to ensure baking success and make your baking process more convenient.
Rotate Your Pans
Rotating your pans during baking is a valuable technique to ensure even cooking and consistent results, especially in ovens with uneven heat distribution.
As ovens can have hot spots, rotating your pans helps promote even browning and prevents one side of your baked goods from becoming overcooked while the other side remains undercooked.
Typically, you’ll want to rotate your pans halfway through the baking time specified in your recipe. This can be done quickly and easily by swapping the positions of the pans in the oven, or by turning them 180 degrees if you’re using a single baking sheet.
If you’re baking multiple pans at once, you may also want to switch their positions between racks to ensure even exposure to heat. Be mindful of oven safety when rotating your pans, using oven mitts to protect your hands from burns.
By incorporating this simple step into your baking routine, you can achieve beautifully golden and evenly baked treats every time.
Cooling Completely
Allowing your baked goods to cool completely is a crucial step in the baking process that ensures optimal texture, flavor, and appearance. While it can be tempting to dig into your freshly baked treats right away, allowing them to cool thoroughly is essential for several reasons.
Firstly, cooling allows the internal structure of the baked goods to set properly, preventing them from collapsing or becoming too dense. This is particularly important for cakes, muffins, and bread, which may continue to cook slightly even after being removed from the oven.
Cooling allows the flavors to develop and meld together, resulting in a more complex and satisfying taste. It also gives any glazes, frostings, or toppings time to set and firm up, enhancing the overall presentation of your baked goods.
To cool your baked goods, transfer them to a wire rack placed on a flat surface to allow air to circulate evenly around them. Avoid stacking or covering them while still warm, as this can trap steam and lead to sogginess.
Depending on the recipe and type of baked goods, cooling times may vary, but a general guideline is to let them cool for at least 15-30 minutes in the pan before transferring them to the wire rack to cool completely.
By exercising patience and allowing your baked goods to cool thoroughly, you’ll be rewarded with treats that are not only delicious but also perfectly textured and visually appealing.
What Makes Silicone Pans Great
Silicone pans offer a myriad of benefits that make them indispensable tools in any baker’s kitchen. Firstly, their non-stick properties eliminate the need for greasing or flouring, making for effortless release of baked goods and easy cleanup.
This feature also ensures that delicate cakes, muffins, and cookies retain their shape and integrity when removed from the pan. Silicone pans are highly flexible, allowing for easy removal of baked goods without the risk of breakage or sticking.
Their flexibility also makes them convenient for storage, as they can be folded or rolled up to save space. Moreover, silicone pans are heat-resistant and can withstand a wide range of temperatures, making them suitable for use in ovens, microwaves, freezers, and even dishwashers.
Their durability means they can be reused countless times without warping or deteriorating. Silicone pans are also available in a variety of shapes and sizes, catering to a wide range of baking needs, from muffin trays to cake molds to baking sheets.
This versatility, coupled with their ease of use and maintenance, makes silicone pans an essential and highly valued tool for both amateur and professional bakers alike.
Frequently Asked Questions (FAQs) – Bake With Silicone Pans
What makes baking with silicone pans such a game-changer?
Silicone pans offer unparalleled flexibility and non-stick properties, making baking easier and more enjoyable than ever before.
How do silicone pans contribute to creating perfectly shaped baked goods?
Silicone pans boast superior heat distribution, ensuring even baking and beautifully shaped treats every time.
Can silicone pans withstand high temperatures for baking?
Absolutely! Silicone pans are designed to withstand high temperatures, making them ideal for all your baking needs.
Are silicone pans easy to clean after baking?
Yes, cleaning silicone pans is a breeze! Their non-stick surface means minimal residue, and they’re dishwasher safe for added convenience.
Can silicone pans be used in both conventional and microwave ovens?
Yes, silicone pans are incredibly versatile and can be safely used in both conventional and microwave ovens, offering flexibility in your baking options.
How do silicone pans contribute to eco-friendliness in the kitchen?
Silicone pans are reusable and durable, reducing the need for disposable baking materials, thus promoting sustainability in your baking endeavors.
Do silicone pans require any special preparation before use?
Nope! Silicone pans are ready to use straight out of the box, saving you time and effort in the kitchen.
Can silicone pans be used for a variety of baking recipes?
Absolutely! Silicone pans are perfect for baking cakes, muffins, brownies, and even savory dishes like quiches and casseroles, making them a versatile addition to any kitchen.
How do silicone pans facilitate easy removal of baked goods?
Silicone’s flexible nature allows for effortless removal of baked goods, ensuring they come out perfectly intact every time, without any sticking or tearing.
Are silicone pans safe for use with food?
Yes, silicone pans are made from food-grade silicone, ensuring they are safe for baking and do not leach harmful chemicals into your food.
Conclusion
In conclusion, baking with silicone pans offers a versatile and convenient alternative to traditional metal bakeware. The flexibility, non-stick properties, and easy cleanup make silicone pans a valuable addition to any kitchen.
By following simple tips such as proper greasing and appropriate temperature adjustments, anyone can achieve excellent results with silicone bakeware. Whether baking cakes, muffins, or savory dishes, the durability and heat resistance of silicone ensure consistent and reliable performance.
Embracing silicone pans opens up a world of creative baking possibilities while streamlining the baking process, making it accessible and enjoyable for both novice and experienced bakers alike.